Mailbox Setup (Mozilla Thunderbird)
Back To Online Support
How to setup a mailbox on Mozilla Thunderbird
Below are the steps you need to follow in order to setup your mailbox
Step 1:
Open Mozilla Thunderbird
Step 2:
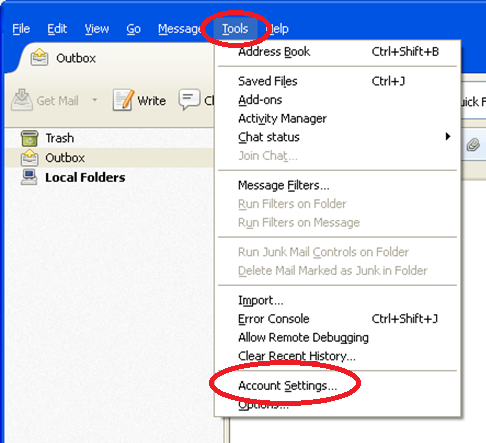
Click the Tools menu option, then select Account Settings as displayed below.
Step 3:
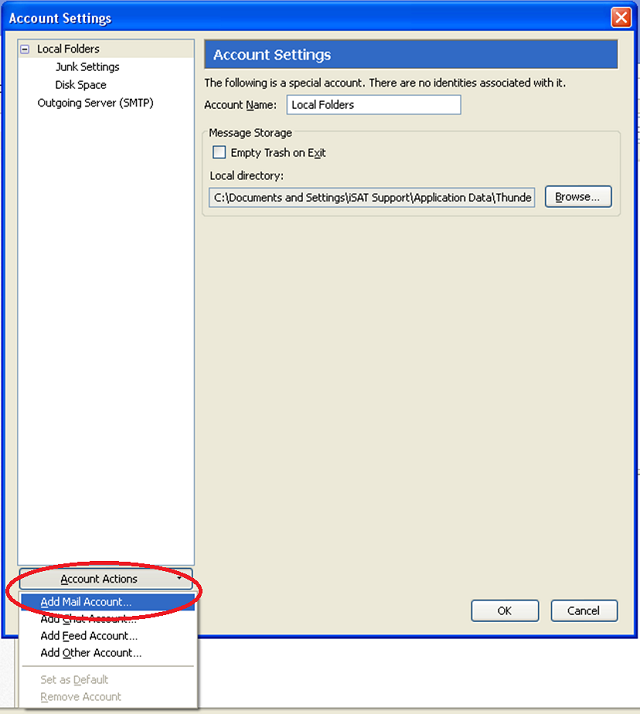
Select Add Mail Account from the Account Actions dropdown list.
Step 4:
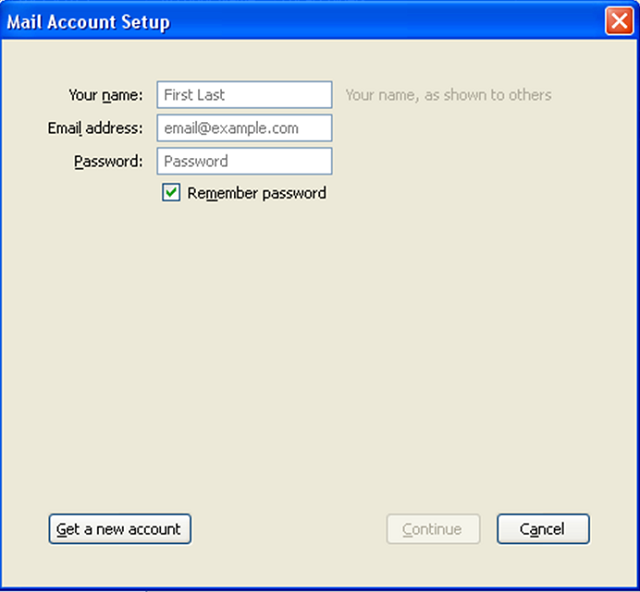
Fill in your mailbox details in the space provided below and ensure that Remember password is checked, then click Continue.
Your name is the name you wish to be displayed when you send an email. Your E-mail address and password are provided by your Internet Service Provider
Step 5:
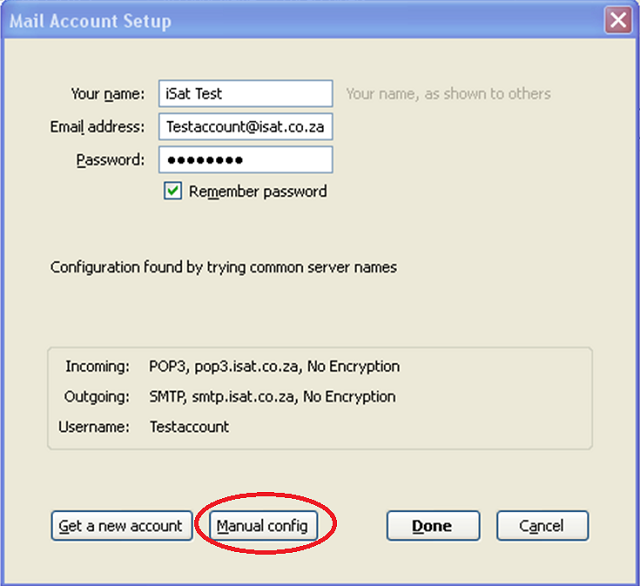
Mozilla Thunderbird will automatically obtain the rest of the mail settings. However, these settings aren't always correct. So you will need to manually change them to the correct settings.
Click Manual Config as shown below
Step 6:
Fill in the rest of your mailbox details, which are provided by your Internet Service Provider and click Done. See example below.

Step 7:
Leave message on server option is automatically selected when you add an E-mail account to Mozilla Thunderbird. To change these settings, click on Advanced config as seen below.

Step 8:
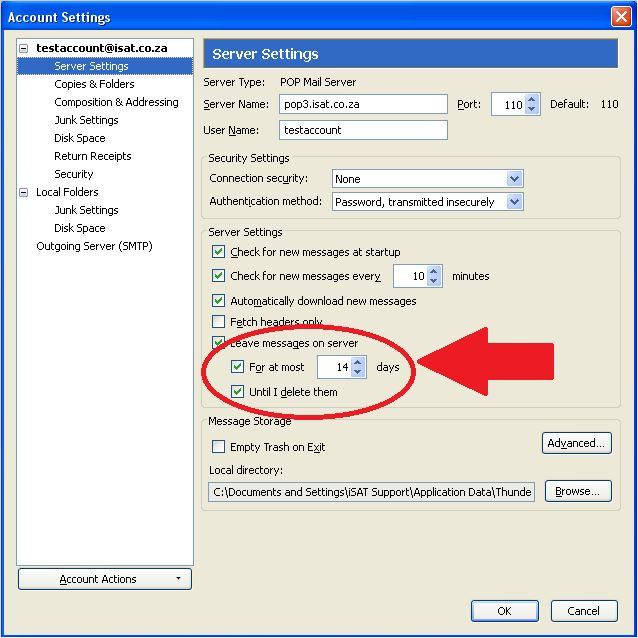
Select Server Settings on the left hand menu. This will then bring up the settings options where you can change you leave message on the server options depending on your needs. See options below
- Recommended setup: Make sure that Leave messages on server is checked. Then change the number of days you want to leave the messages on our server
- Multiple Devices: Make sure that Leave messages on server is checked. You can either set the number of days you want to leave on our servers or alternatively, uncheck for at most checkbox completely.
- If you check Until I delete them, then the messages will be deleted when you delete them in Mozilla Thunderbird. This may be useful if you're trying to keep multiple devices in sync without IMAP, but you shouldn't choose it if you're leaving messages on our servers to be backed up.
Please Note: If you leave messages on the server forever, it can eventually slow down your mail connections and use up your disk space allocation. So we recommend choosing a number of days that's long enough for you to be able to read the messages in your other mail programs (or Webmail). In terms of performance, even using a large number such as 365 days is better that not checking this box.
Step 9:
Once you are happy with your Leave message on server setup, click Ok.
Step 10:
This next step may or may not occur. A Warning may pop up as seen in the below image.
This is nothing to worry about. It is only informing you that your incoming and outgoing mail servers are not using encryption. This encryption is not always required, depending on the ISP
Simply tick/check the I understand the risks checkbox and then click Done to complete your mailbox setup.

If you have any problems setting up your E-Mail account please feel free to call us on 010 555 0650
Regards,
The iSAT Team
Back to top