Mailbox Setup (Outlook 2013)
Back To Online Support
How to setup a mailbox on Microsoft Outlook 2013
Below are the steps you need to follow in order to setup your mailbox
Step 1:
Open Outlook 2013
Step 2:
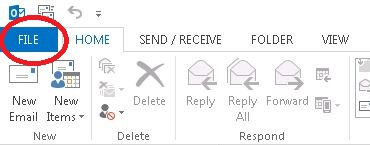
Click the File menu option, then select Add Account.
Step 3:
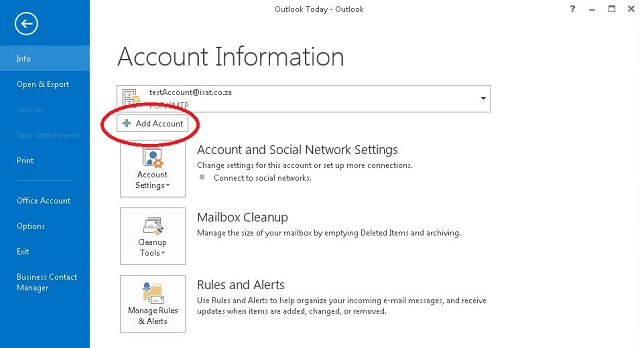
Select Add Account.
Step 4:
Select manually configure server settings option, and click Next.

Step 5:
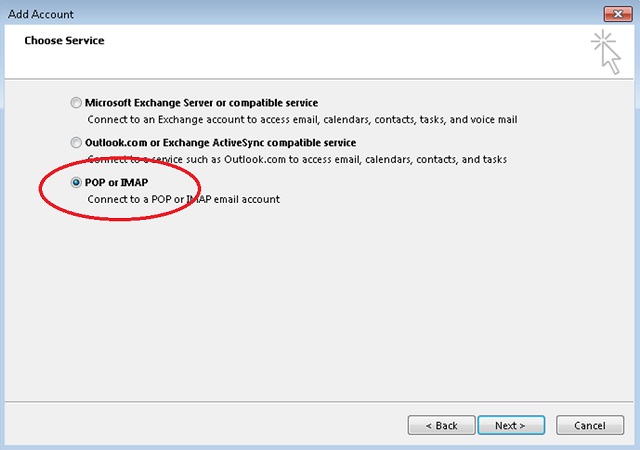
Select the POP or IMAP option, then click Next.
Step 6:
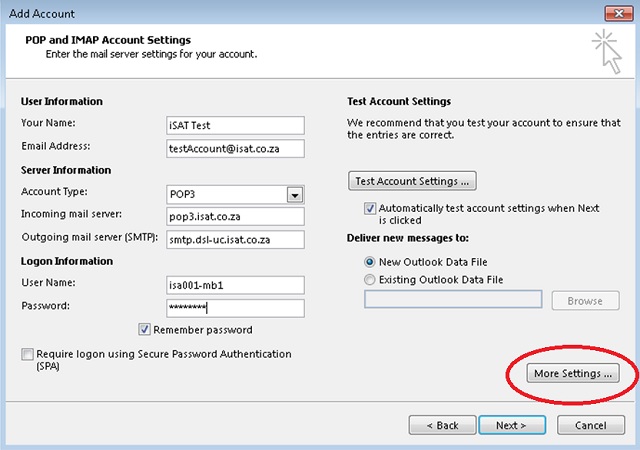
Fill in your mailbox details, which are provided by your Internet Service Provider. See example below.
Step 7:
Click the More Settings button as pointed out in the above image.
Step 8:
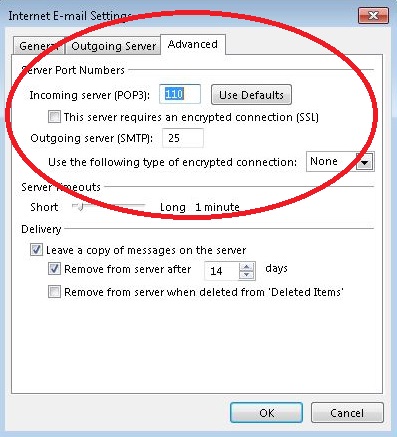
The "Internet E-mail Settings" window appears. Choose the Advanced tab.
Step 9:
Ensure that the Incoming server (POP3) is set to 110
Step 10:
Ensure that This server required an encrypted connection (SSL) is UNCHECKED.
Step 11:
Ensure that the Outgoing server (SMTP) is set to 25.
Step 12:
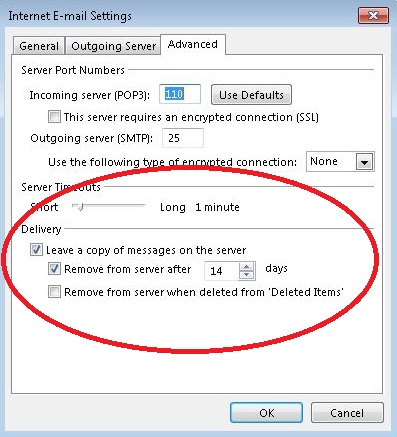
Under the header Delivery on the Advanced Tab, you have a few options here, depending on your needs.
- Recommended setup: Make sure that Leave a copy of messages on the server is checked. Then change the "14" to the number of days you want to leave messages on our servers.
- Multiple Devices: Make sure that Leave a copy of messages on the server is checked. You can either set the number of days you want to leave messages on our servers or alternatively, uncheck the Remove from server after x days checkbox completely
- If you check Remove from server when deleted from 'Deleted Items, the messages will be deleted when you delete them in Outlook. This may be useful if you're trying to keep your Webmail box (sort-of) in sync with Outlook without using IMAP, but you shouldn't choose it if you're leaving messages on our server to be backed up.
Please note: If you leave messages on the server forever, it can eventually slow down your mail connections and use up your disk space allowance. So we recommend choosing a number of days that's long enough for you to be able to read the messages in your other mail program (or Webmail). In terms of performance, even using a large number such as 365 days is better than not checking this box.
Step 13:
Click OK to close the "Internet E-mail Settings" window.
Step 14:
After you close the "Internet E-mail Settings" window, the "Change Account" screen will still be visible. Ensure the Test Account Settings checkbox is selected.

Step 15:
Click Next. Outlook will test the settings, then should tell you that "all tests completed successfully"
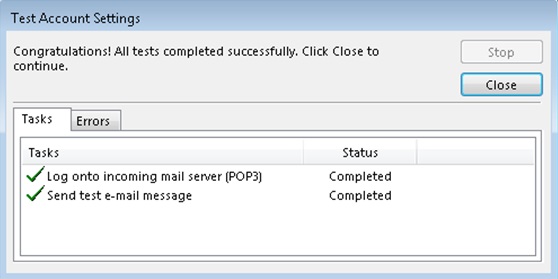
If however Outlook tells you a test failed, double check your settings and ensure they have been entered correctly.
Step 16:
Close the Test Account Settings window once all is good and click Finish and you mail should be working.
If you have any problems setting up your Mail account please feel free to call us on 010 555 0650.
Regards,
The iSAT Team
Back to top