How To Setup A D-Link DAP-1360 Wireless Extender
Back To Online Support
This guide will show you how to setup your D-Link DAP-1360 Wireless extender.
Please note: Your router will need to be on and wireless on the access point needs to be preconfigured.
Disconnect the ethernet cable (RJ45) from your router and connect it to your D-Link DAP-1360 Extender for this setup.
Step 1:
Obtain you Default Gateway (for more information, see How to obtain your Default Gateway)
Step 2:
Open your Internet Browser, such as Internet Explorer, Google Chrome, etc...
Step 3:
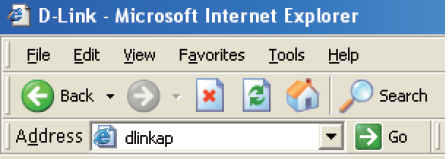
Enter your Default Gateway or enter http://dlinkap in the address bar of your internet Browser as seen below and press Enter.

Step 4:
This will then display the Login page to enter your router username and password (See below image). The default factory settings for the username and password should both be "Admin" or the Password will be blank. click Login.

Step 5:
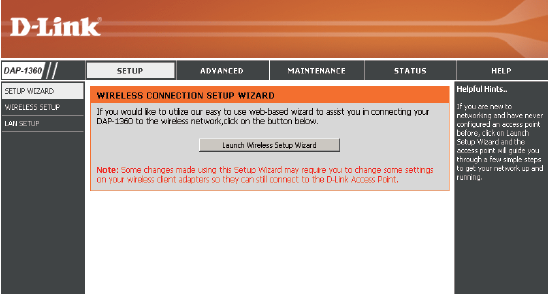
The below should appear. Click Launch Setup Wizard to configure your access point.

Step 6:
Click Next to continue

Step 7:
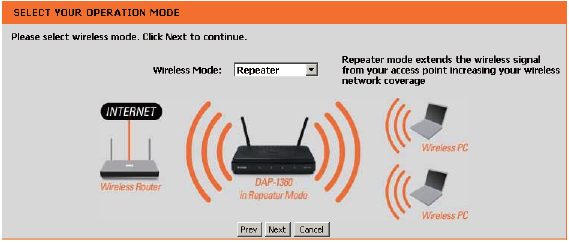
Select Repeater from the drop-down list as shown below:

Step 8:
Select Manual configuration to setup your network manually and click Next.

Step 9:
Find your router or access point from the list, click the radio button in the right column, and click Connect.

Step 10:
Choose which Security Mode you want to use and click Next to continue.

Step 11:
If you select WEP, choose the key type (ASCII or HEX), the key size (64 or 128-bit), and enter the wireless security password. Click Next to complete the Setup Wizard.

Step 12:
If you select WPA or WPA2, enter the wireless security password. Click Next to complete the Setup Wizard.

Step 13:
If you select Auto, enter the wireless security password. Click Next to complete the Setup Wizard.

Step 14:
The Wireless Setup Wizard is complete. Click Finish to reboot the device.

Should you need assistance setting up your D-Link DAP-1360 wireless extender, please feel free to call us on 010 555 0650
Regards,
The iSAT Team
Back to top