How to Setup a Wi-Fi Network on Windows 8
Back To Online Support
This guide will show you how to set up a Wi-Fi network using Windows 8.
Please note that you will only be able to set up a Wi-Fi network if your PC/Device has Wi-Fi capabilities and if a Wi-Fi network is available in the area you are in.
There are a few ways to go about setting up your Wi-Fi network. Once is via a shortcut on your desktop taskbar and the other is via the Settings Menu on your start up screen, as well as via the Control Panel.
If you are on the startup Screen, go to Step 1.
If you are on your desktop, go to Step 3.
Step 1:
On the Start-up Screen, move your mouse to the bottom or top right corner of the screen and select the gear icon labelled Settings.
If you are using a touch screen Device, swipe left form the right side of the screen and select Settings.

Step 2:
Click (or tap) on the Wi-Fi icon. Then proceed to Step 4.
Step 3:
Click (or tap) on the Wi-Fi icon on your taskbar in the bottom right corner of your screen. Then proceed to Step 4.

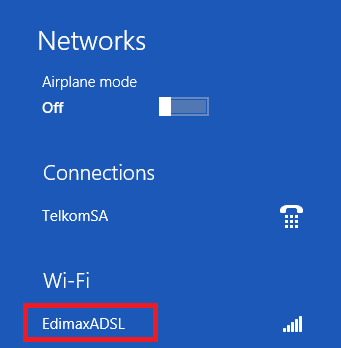
Step 4:
This will bring up a list of Wi-Fi networks available in your area. click (or tap) the Wi-Fi network you want to connect to, in the example below we've called the network EdimaxADSL.
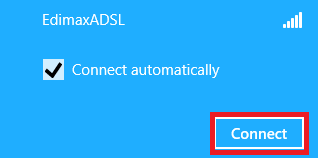
Step 5:
Click (or tap) Connect.
If you wish to connect to the selected network automatically every time it is available, ensure that Connect automatically is ticked.
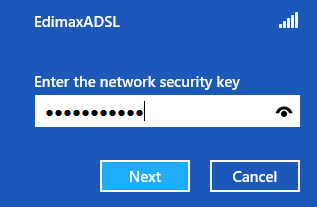
Step 6:
If the network you selected is secure, you will be prompted to enter the network security key.
Enter your Wi-Fi password and click (or tap) Next to connect.
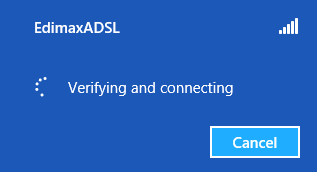
Step 7:
Windows will verify the password as shown below.
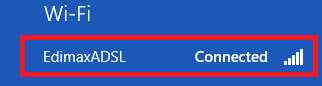
Step 8:
If all is entered correctly, you will be connected to the Wi-Fi network as shown below.
Should you need assistance setting up your Wi-Fi network, please feel free to call us on 010 555 0650
Regards,
The iSAT Team
Back to top